Image to Pixel Art: How to Convert a Picture Without Losing Detail
Learn how to turn an image into pixel art with the right crop, grid size, color limit, and cleanup method, then convert your picture online for free.

BeadsHub Studio
Author
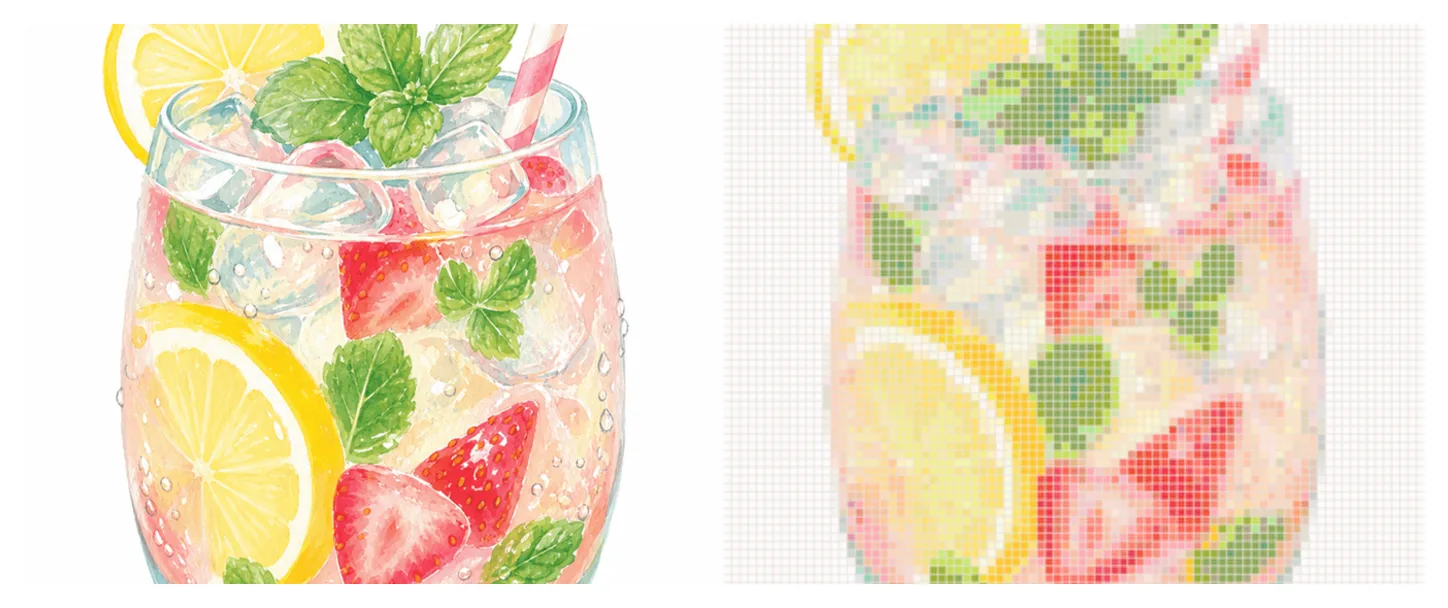
Turning an image to pixel art is not just a matter of making a picture blocky. A clean conversion reduces the image to a deliberate grid, keeps the subject recognizable, limits colors, and removes details that no longer help at the new size. The fastest workflow is to crop around one clear subject, choose the smallest useful grid, reduce the palette, inspect the result at actual size, and repair a few important pixels by hand.
You can apply that process to a photo, illustration, icon, game reference, or craft design. Preserve the silhouette first, protect the details that identify the subject, and simplify everything else. A converter creates a starting point; you decide what should remain after the picture becomes small.
This guide uses the free BeadsHub pattern maker for the example. It converts a picture into a grid matched to real fuse-bead colors, so every cell can also represent one bead. The same crop, resolution, palette, and cleanup principles apply to other pixel art converters.
What happens when you convert an image to pixel art?
A normal photo may contain millions of colors, soft edges, tiny highlights, texture, and gradual shadows. Pixel art has far fewer cells and usually a much smaller palette. Conversion therefore makes four important decisions:
- Resolution: how many cells describe the width and height.
- Palette: which limited colors replace the source colors.
- Sampling: which source details survive when many source pixels become one output cell.
- Cleanup: which isolated pixels, broken edges, or noisy clusters should be corrected.
Simply shrinking a photo and enlarging it again can produce blurry edges, muddy colors, or random single-pixel noise. A useful conversion keeps large shapes readable and uses small details only where they communicate something important, such as an eye, button, letter, or highlight. If the subject is not recognizable at thumbnail size, change the crop, grid, or palette before editing individual cells.
Choose a picture that converts cleanly
The source picture has more influence on the result than most advanced settings. A pixel art converter works best when the image already has a clear visual hierarchy.
Good source images usually have:
- One main subject that occupies a large part of the frame.
- A silhouette that remains recognizable without fine texture.
- Clear contrast between the subject and background.
- Important features that are not hidden in shadow.
- Simple lighting and a small number of dominant colors.
Icons, product shots, isolated objects, character portraits, and flat illustrations are usually straightforward. Pet photos can work, but hair, fur, gradients, and scenery create many small color regions. Group photos, tiny text, reflections, and motion blur are harder to simplify.
Do not assume that a larger original file guarantees better pixel art. Source resolution helps only when the important subject is large and clear. A tightly cropped 800-pixel image can convert better than a 4K photograph in which the subject occupies one small corner.

How to convert an image to pixel art step by step
This workflow starts with composition and ends with individual-cell cleanup. Make the large decisions first; pixel edits made before the crop and grid are correct often have to be repeated.
1. Crop tightly around the subject
Remove scenery that does not contribute to the design. Let the subject fill most of the crop while leaving enough space to keep its silhouette intact. Match the ratio to the output: square for a sprite or pegboard, portrait for a standing character, and landscape for a wide object. A tighter crop gives useful grid cells to the subject without making the project larger.
2. Choose the smallest grid that stays readable
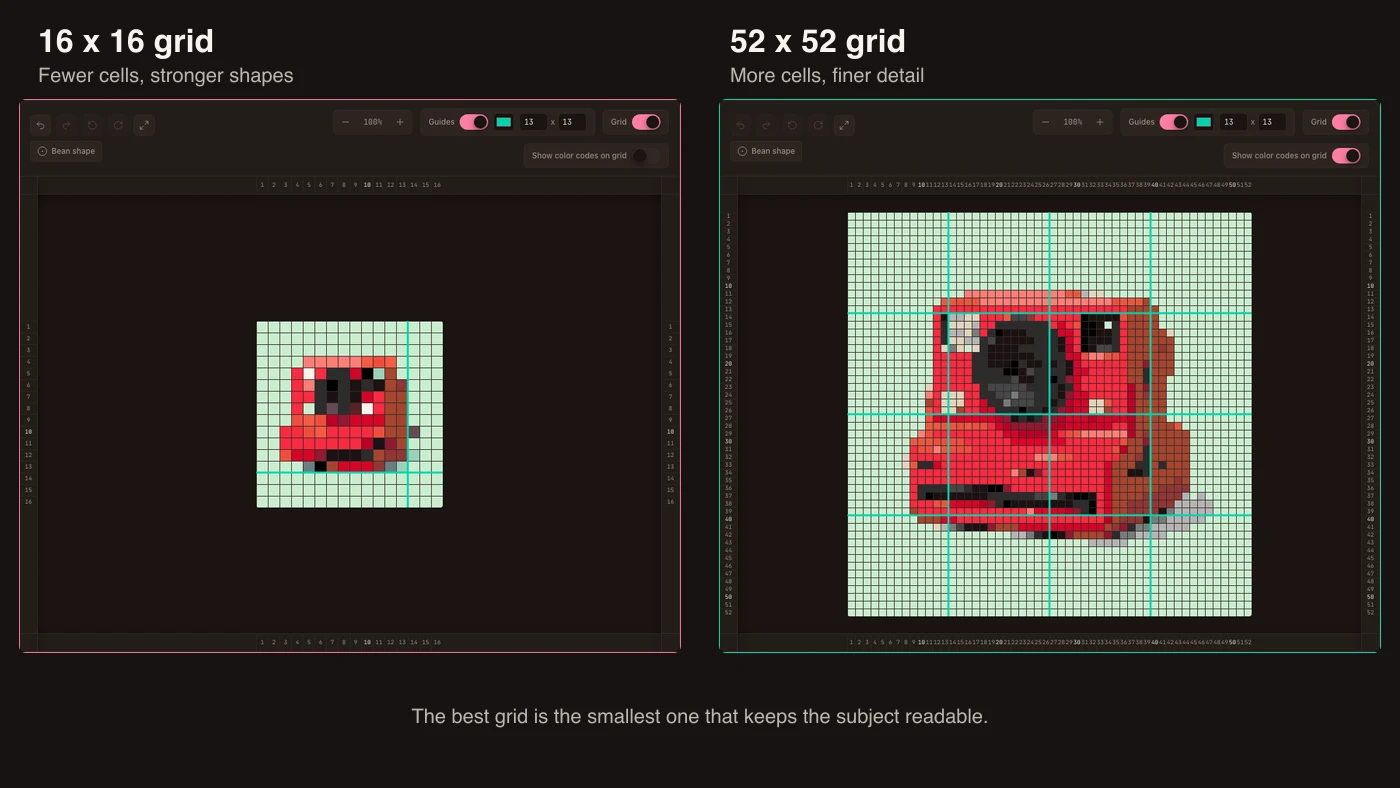
Grid size controls detail and complexity. A small grid creates stronger blocks and is easier to edit or build, but narrow features may disappear. A larger grid preserves curves and lettering while also keeping more noise. Start small and increase the dimensions only until the silhouette and essential features read clearly.
For a bead pattern, also measure the pegboards and finished physical size. One grid cell equals one bead, so a 52 × 52 result can require up to 2,704 beads before empty cells are removed. For digital art, the same grid determines the native sprite dimensions.
3. Reduce the number of colors
More colors do not automatically improve the result. A large palette may resemble the photograph on screen while creating noisy clusters of similar shades. Begin with enough colors to separate the background, subject, shadows, and accents. Reduce the limit until unnecessary variation disappears, restoring a color only when its removal merges meaningful shapes.
When using physical beads, select the bead brand and palette you own before judging the colors. The converter must map the source to available bead codes rather than to arbitrary screen colors. For ordinary digital pixel art, choose a limited palette that fits the visual style and intended display.
4. Match the processing style to the source
Photos benefit from smoother sampling before colors are reduced. A crisp icon or sprite needs sharper edge treatment so blended pixels do not appear around its outline.
In BeadsHub, choose Photo for a photographic source and Pixel art for an icon, cartoon, or existing sprite. Start with the Standard pattern style. Cartoon favors brighter, simpler regions; Blend mixes small color cells to suggest gradients; Sketch emphasizes light, shadow, and edges. Use the option that protects the subject's structure rather than the one that looks most complex.
Color compression changes priorities: subject-focused settings preserve large regions, while detail-focused settings retain tiny accents. If the result becomes speckled, favor the subject and remove tiny colors. If an eye disappears, retain more detail or restore it manually.
5. Inspect the result at actual size
Zooming in is useful for editing, but it can hide whether the picture works as pixel art. Check both views:
- At actual size, confirm that the subject reads immediately.
- Zoomed in, look for broken outlines, accidental holes, isolated cells, and jagged curves.
- Compare light and dark regions rather than expecting every source shade to remain.
- Check the color list for shades used by only a few cells.
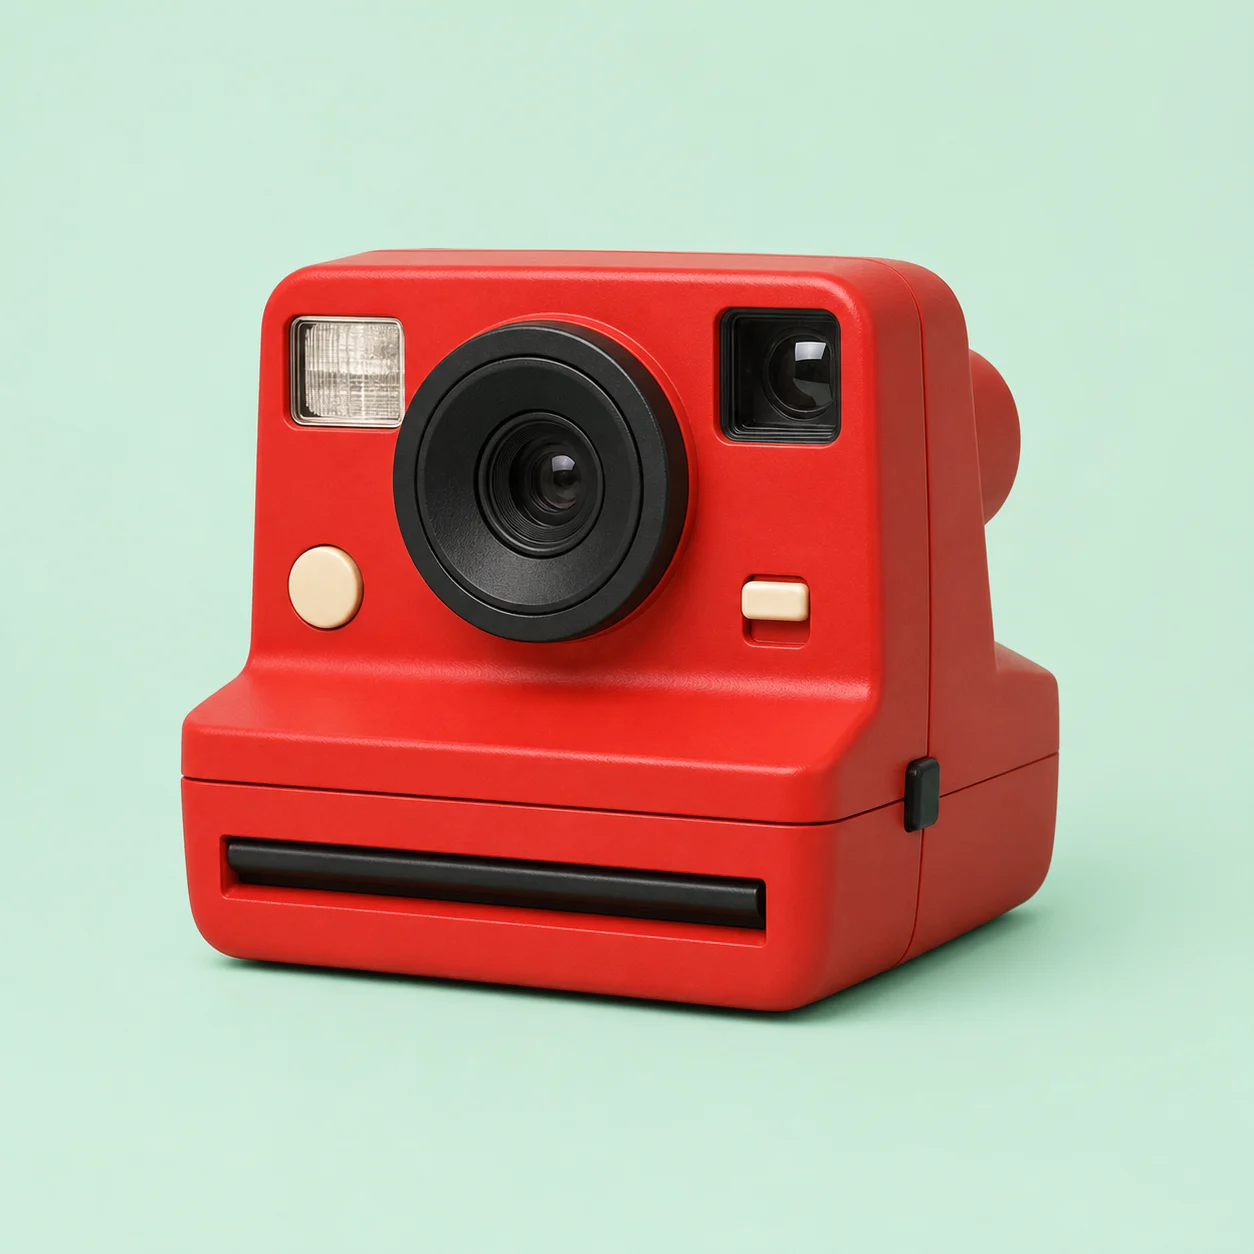
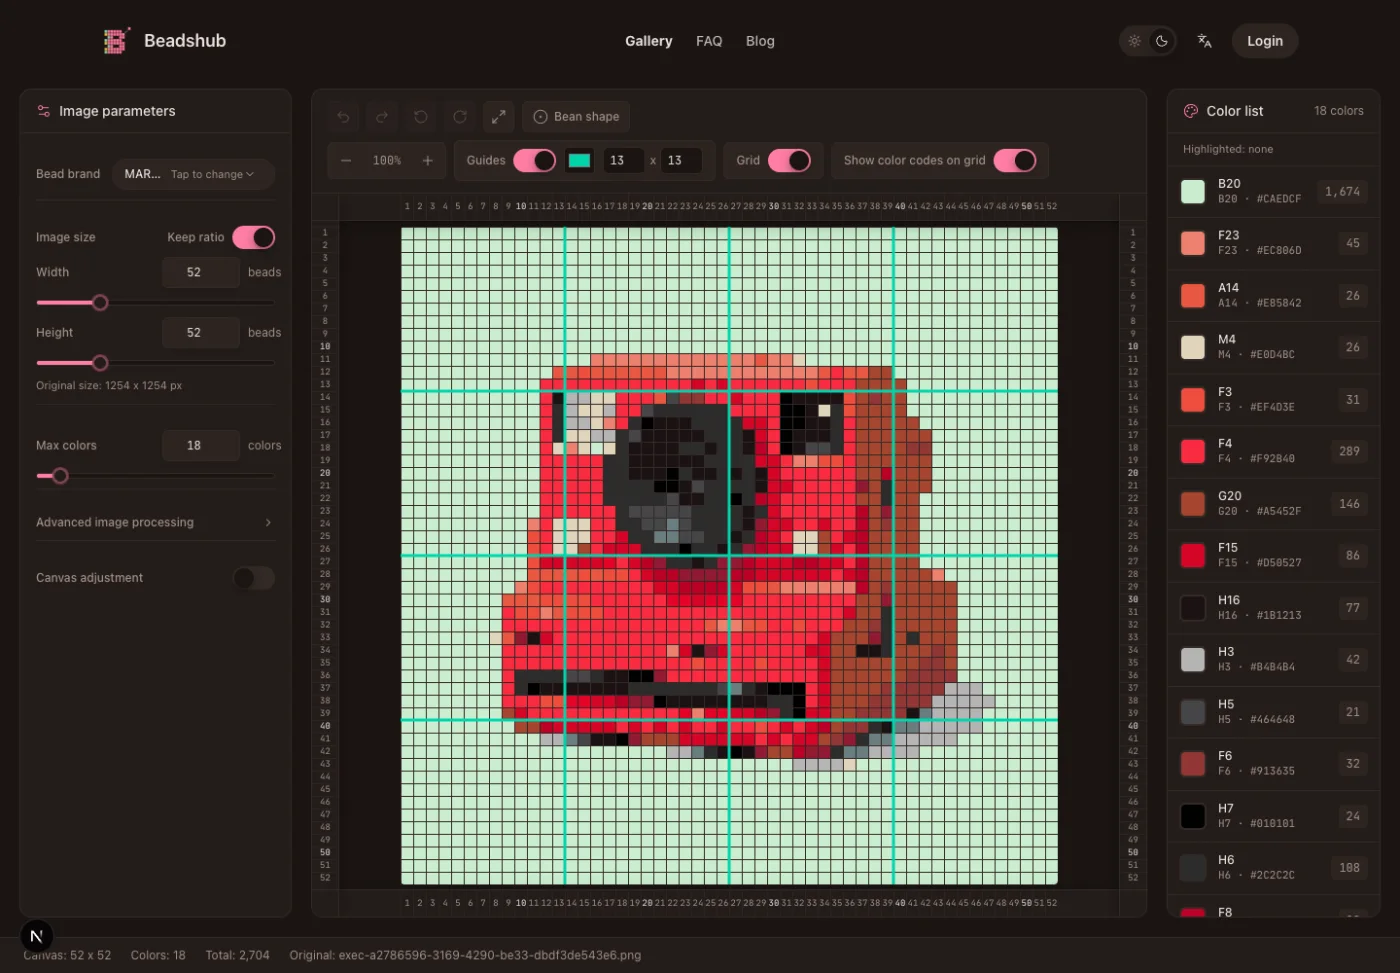
The real converter example below uses a 52 × 52 grid and 18 bead colors. The red camera remains recognizable because its large body, dark lens, pale background, and small cream controls form distinct regions. The preview also exposes individual cells that can be cleaned before export.
6. Clean important edges and details by hand
Automatic conversion cannot know which tiny detail carries meaning. Use a brush, fill tool, eyedropper, or eraser for a short final pass. Repair the silhouette first, then the face, lettering, controls, or other identifiers. Switch between the close grid and actual size so local edits do not weaken the whole shape.
When the result is a fuse-bead pattern, verify the bead count and color codes before exporting the PDF. For a broader explanation of physical sizing, palette selection, editing, and building, continue with how to make your own Perler bead patterns.
How grid size and color count change the result
Grid and palette size solve different problems. More cells describe edges and features; more colors describe color differences. Adding colors cannot repair a broken outline, while an extra contrasting color can separate adjacent parts that already have enough cells.
| Problem | Change first | Why |
|---|---|---|
| Eyes or letters disappear | Increase the grid slightly | The feature needs more cells |
| Subject blends into the background | Adjust crop or contrast | More cells alone preserve the same weak separation |
| Surface looks speckled | Reduce colors or remove tiny colors | Too many small shade clusters create noise |
| Image looks muddy | Use fewer, distinct colors | Similar shades weaken shape boundaries |
| Result is too difficult to build | Reduce grid and palette | Both changes lower bead count and sorting work |
Common image to pixel art conversion problems
Blurry result: Use a sharper source or select the pixel-art source mode for icons and sprites. Do not enlarge a tiny image smoothly and upload the enlarged screenshot; this introduces blended edge colors.
Unrecognizable subject: Return to the crop. Remove background, strengthen the outline, and let the subject fill more of the frame. Add grid cells only where key features still need room.
Too many colors: Lower the maximum color count and increase the threshold for removing tiny colors. Keep shades that separate major parts and replace one-cell variations that only imitate photographic texture.
Broken faces or text: Crop closer, increase the grid gradually, and use a detail-focused pass. Redraw eyes and letter strokes by hand. Simplify wording that cannot survive at the chosen size.
Noisy background: Use a plain source, crop closer, or erase unwanted background cells. Blur and texture often become disconnected color islands; empty space is cleaner.
Image to pixel art FAQ
Is a pixel art converter the same as resizing an image?
No. Resizing changes dimensions, while a useful pixel art converter also controls sampling, palette reduction, grid visibility, and cleanup. The conversion should produce intentional color cells rather than a small blurry photograph.
What kind of picture is best for pixel art?
A picture with one clear subject, strong contrast, a simple background, and recognizable large shapes is easiest. Icons and illustrations usually require less cleanup than complex photos, but a tightly cropped product or pet photo can also convert well.
How many pixels should the result use?
There is no universal size. Use the smallest grid that preserves the silhouette and essential details. Increase it when important features disappear, not simply because a larger number appears more accurate.
Can you turn a photo into pixel art?
Yes. Crop around the subject, use photo-oriented sampling, limit the palette, and clean up small clusters afterward. Portraits, pets, and objects with clear separation convert more reliably than crowded scenes or low-contrast images.
Can the converted image become a Perler bead pattern?
Yes. In BeadsHub, each output cell represents one bead and the colors are matched to a selected fuse-bead palette. Check the grid dimensions, color codes, and bead counts, edit weak details, and export the pattern before building. You can also browse the Perler bead pattern gallery to compare how finished designs use outlines and limited colors.
A strong image to pixel art result comes from deliberate simplification. Start with a clean source, crop before resizing, use the smallest readable grid, limit the palette, and reserve manual editing for the pixels that carry identity. Open the free image to bead pattern converter to test the process, then use the Perler bead ironing guide when the physical design is ready to fuse.