Spreadsheet Pixel Art: A Google Sheets and Excel Guide
Turn ordinary spreadsheet cells into a controlled pixel canvas with a reusable flower project.

BeadsHub Studio
Author
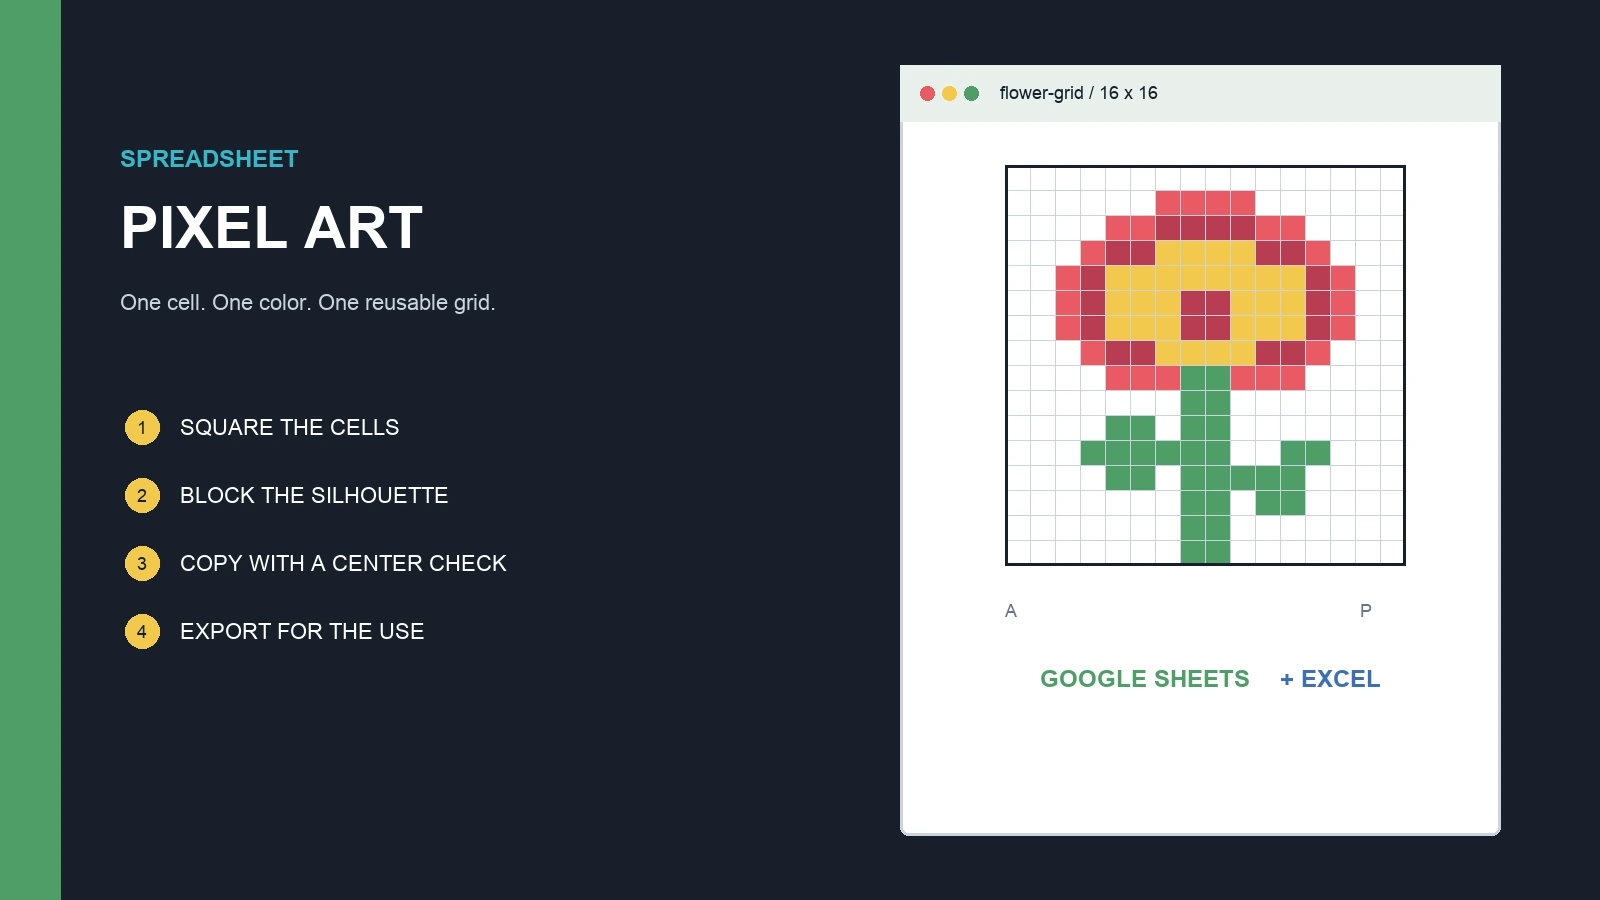
Spreadsheet pixel art uses ordinary cells as a manual pixel canvas. Set a small range to square cells, give each cell one color, and a Google Sheets or Microsoft Excel worksheet becomes a place to design icons, printable grids, or draft craft patterns.
This guide builds one original 16 x 16 flower. The method is manual: a spreadsheet helps place, count, copy, and share cells, but it is not a photo converter. For automatic conversion, start with the BeadsHub pattern maker.
The underlying idea is simple: one cell represents one pixel. The pixel art grid guide explains how resolution and proportions affect a design; this page focuses on the actual Google Sheets and Excel workflow.
Prepare a square spreadsheet grid
Start with a blank worksheet and choose a compact working range. Select A1:P16 for a 16 x 16 project, A1:AF32 for 32 x 32, or a custom rectangle when the subject is wider or taller.
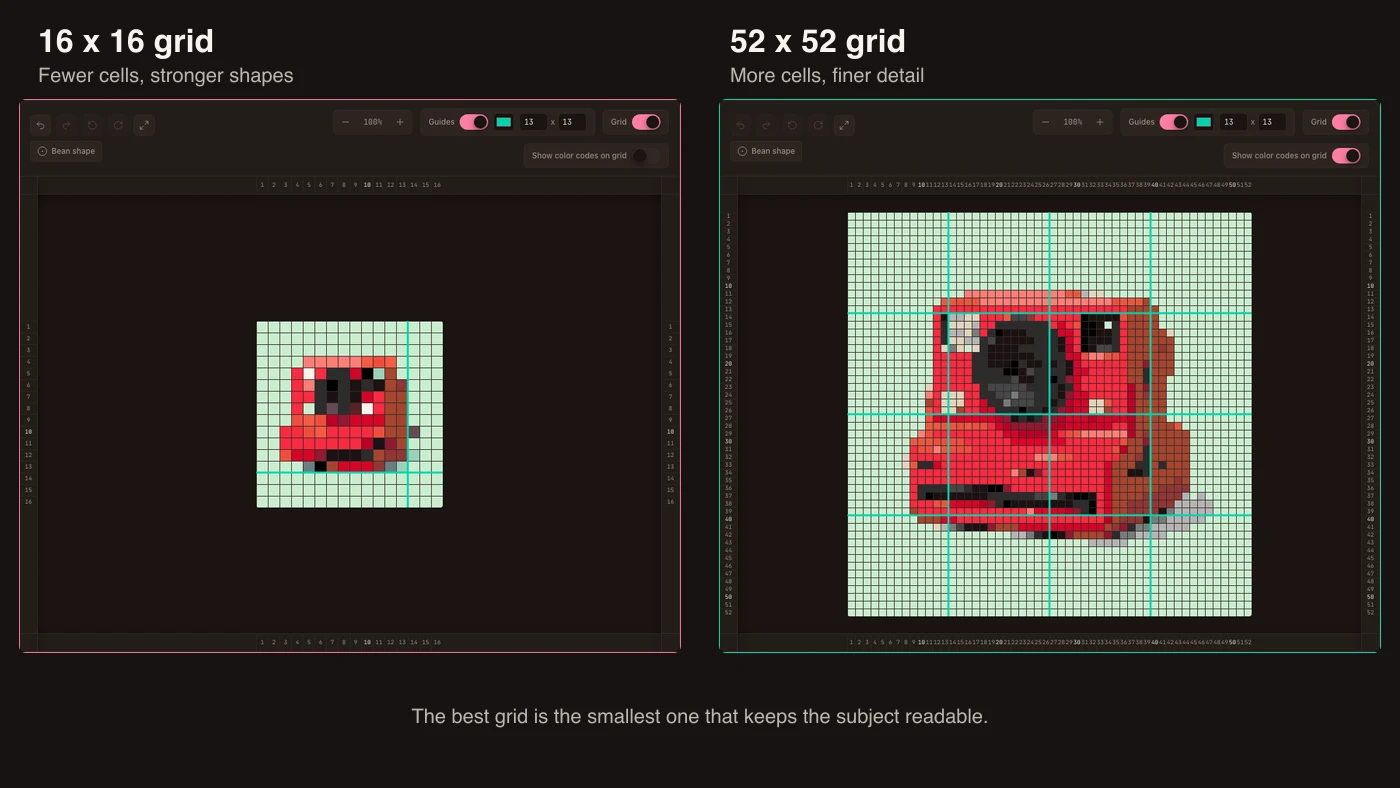
Sixteen cells across is enough for a simple object. A 32 x 32 range gives a detailed icon more room. A 48 x 48 project is possible, but filling 2,304 cells manually takes longer, and many formatting rules can reduce responsiveness.
Make cells visually square in Google Sheets
Select the required columns, right-click a selected column heading, choose Resize columns, and enter a pixel width. Then select the matching rows, choose Resize rows, and use the same pixel value. A value around 22 to 28 pixels creates a comfortable editing grid on a desktop display.
Check a test block at 100 percent zoom. Display scaling can affect the grid, so judge the shape too.
Make cells visually square in Excel
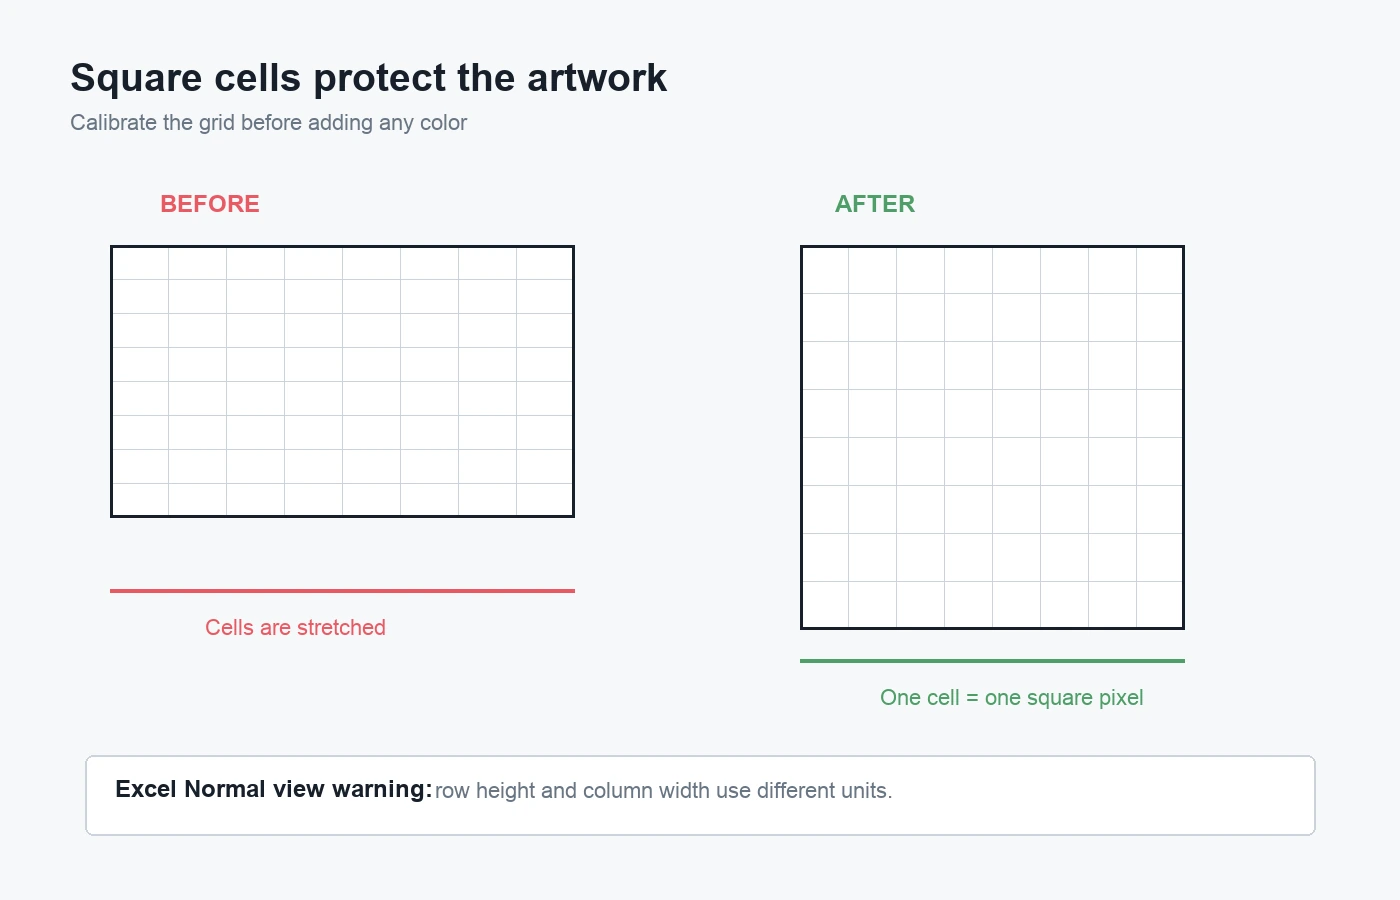
Excel's normal worksheet view does not express column width and row height with the same unit: column width is based on character width, while row height is shown in points. Typing the same number into both boxes therefore does not guarantee a square.
Drag the selected boundaries while checking a test block, or switch to View > Page Layout and use a shared physical measurement. Microsoft's official sizing guide documents both methods.
Do not merge cells inside the canvas. A merged region stops the one-cell-one-pixel rule and makes copying, counting, and printing unpredictable.
Draw an easy spreadsheet pixel art flower
Keep the sheet grid visible while placing the first shapes. Begin with the flower's structure rather than decorating isolated cells.
1. Mark the center line
On a 16 x 16 canvas, use the boundary between columns H and I as the center. Mark it temporarily with a stronger border so the petals and leaves are easy to compare.
2. Place the stem and leaves
Fill a two-cell-wide green stem from rows 9 through 15. Add leaves on each side and keep them connected; isolated green cells read as noise.
3. Build the flower from large color regions
Place a yellow center near rows 5 to 8, then add red or pink petals. Work in clusters; the silhouette should read as a flower when borders and labels are hidden.
4. Add one darker shade only where it helps
Use a darker petal color along one edge to suggest depth. On a small grid, background, stem, leaf, center, petal, and shadow are usually enough.
Choose direct fills or conditional formatting
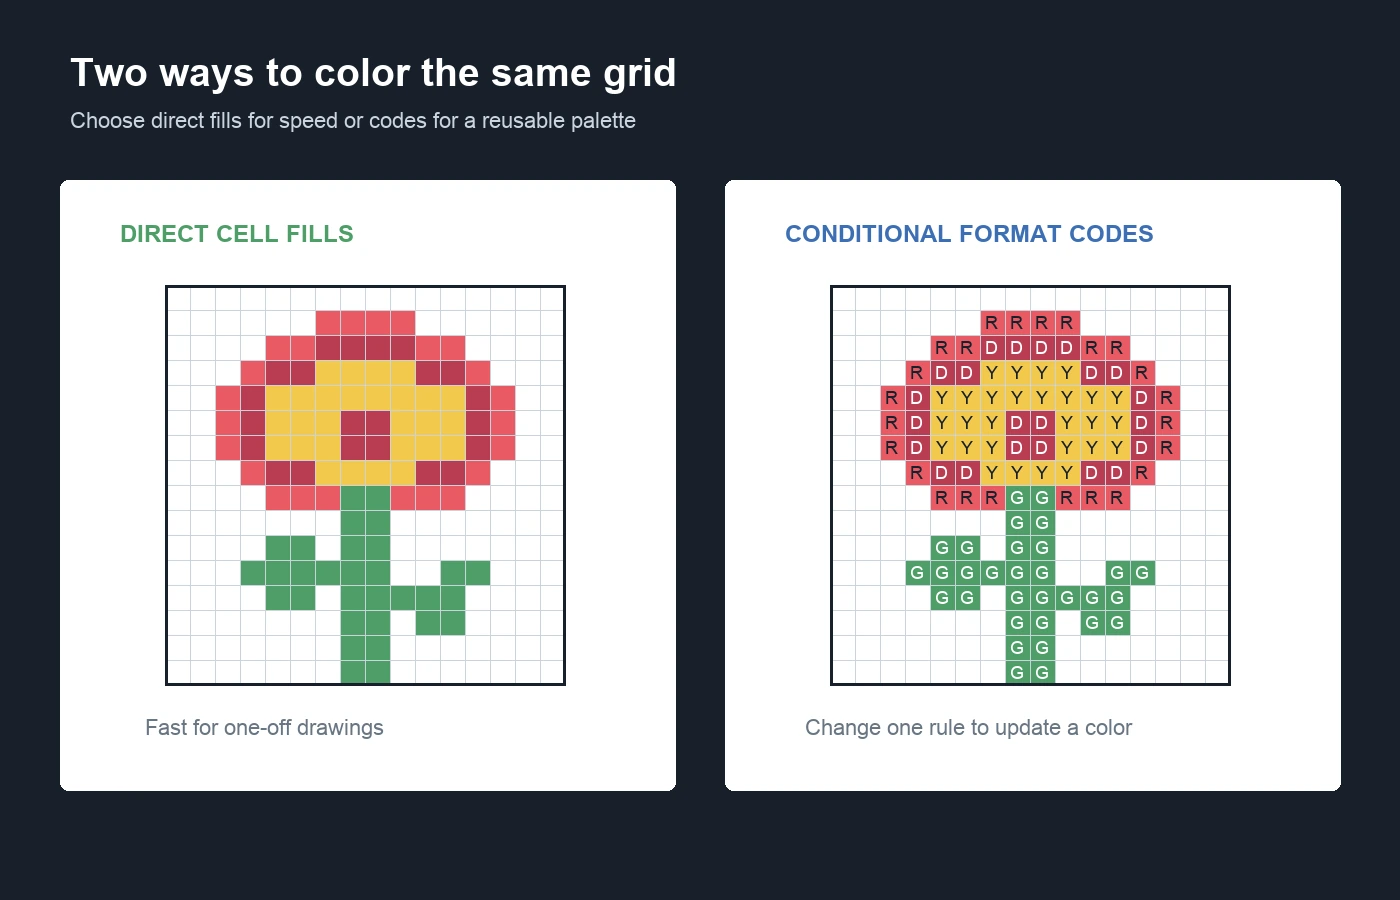
There are two practical ways to color spreadsheet pixel art. Both produce filled cells, but they support different editing habits.
Direct background fills are fastest
Select cells and use the fill-color control. Direct fills suit a one-off drawing and keep the sheet free of codes. Paint one connected cluster at a time.
Changing the palette later requires replacing each old shade manually.
Conditional formatting creates a replaceable palette
Enter codes such as P, D, Y, and G, then create one formatting rule per code. In Google Sheets, select the range and open Format > Conditional formatting. Google's official documentation explains the rules.
Use a text-equals rule for each code and set its background and text to the same color if you want the letters hidden. Keep a visible legend outside the canvas. Changing a rule then updates every matching cell at once.
Conditional formatting suits reusable templates but adds setup. Limit rules to the canvas and remove duplicates.
Copy repeated and symmetrical shapes
Spreadsheets are efficient when a design repeats. Select a finished petal, leaf, border segment, or quadrant; copy it; then paste it into an equal-size destination range.
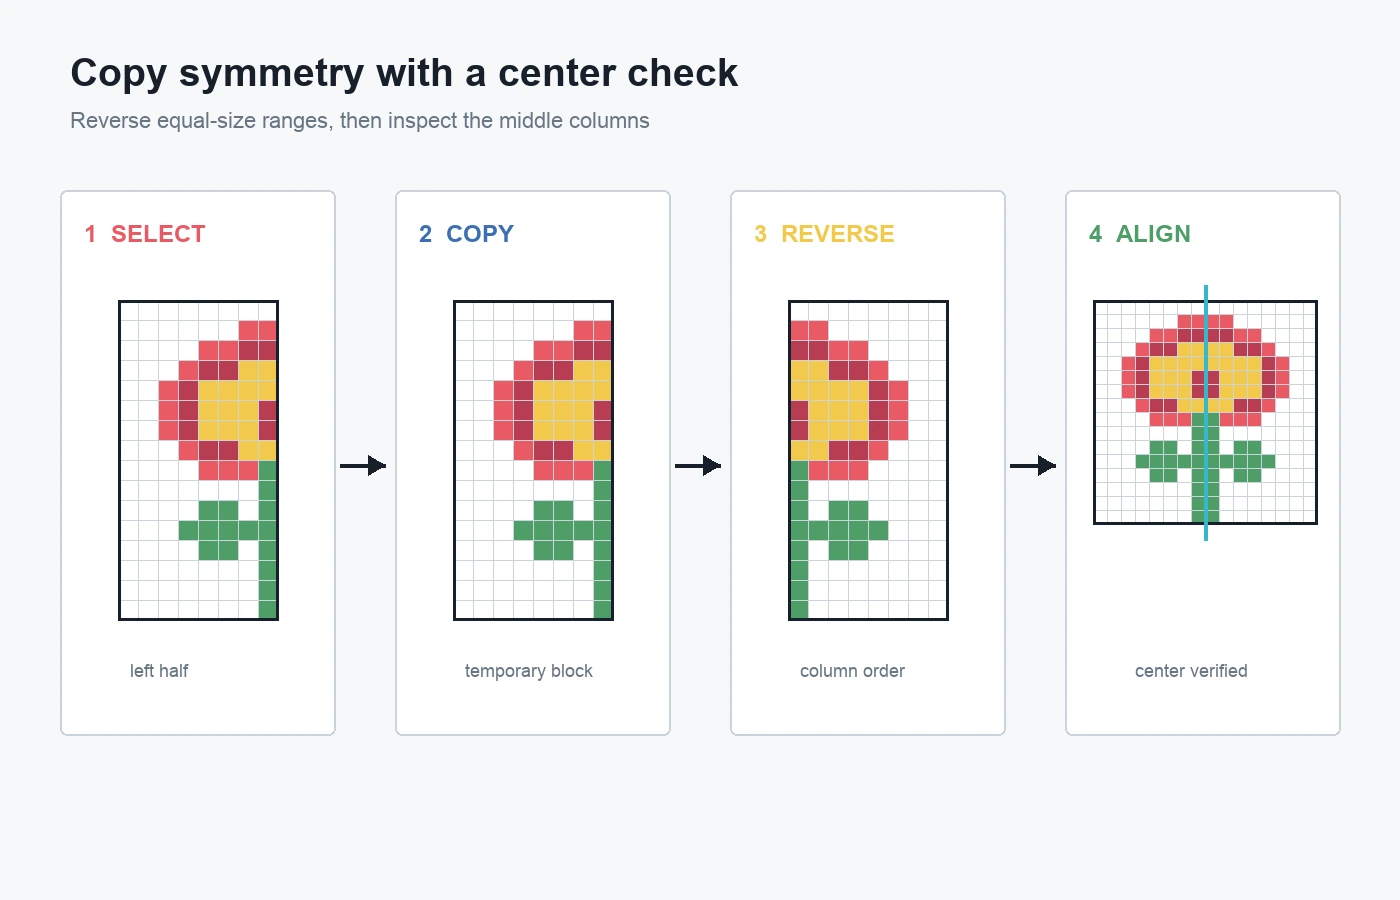
Mirror with a temporary helper range
Cells do not have a universal image-flip command. Copy the left half to a temporary area, reverse its column order manually or with formulas, then paste the result into the right half.
For an eight-column half, map the first source column to the eighth destination column and continue inward. Paste formula results back as values or formatting.
Check the center before trusting the copy
Symmetry errors usually happen at the center line. A duplicated center column makes the flower too wide; a skipped column creates a gap. Count the final width and compare the two sides at normal zoom. Intentional asymmetry, such as offset leaves, should be added only after the main silhouette is stable.
The fill handle is better for repeating a simple border or code sequence than for mirroring a picture. Always inspect what it generated before applying it across the full canvas.
Save a reusable spreadsheet art template
Once the 16 x 16 grid works, turn it into a clean base file instead of resizing cells for every project.
Keep one untouched template with square cells, a palette legend, canvas boundary, and optional center guide. Name it clearly, such as 16x16 Template, and duplicate it before drawing.
In Google Sheets, keep the master view-only and use File > Make a copy. In Excel, preserve a clean template or worksheet tab. Remove rules that point outside the canvas.
A second clean tab without labels can serve as the presentation view.
Export or print spreadsheet pixel art
Choose the output from what the reader needs to do with it. A clean image is best for sharing; a bordered PDF is better when someone must count cells.
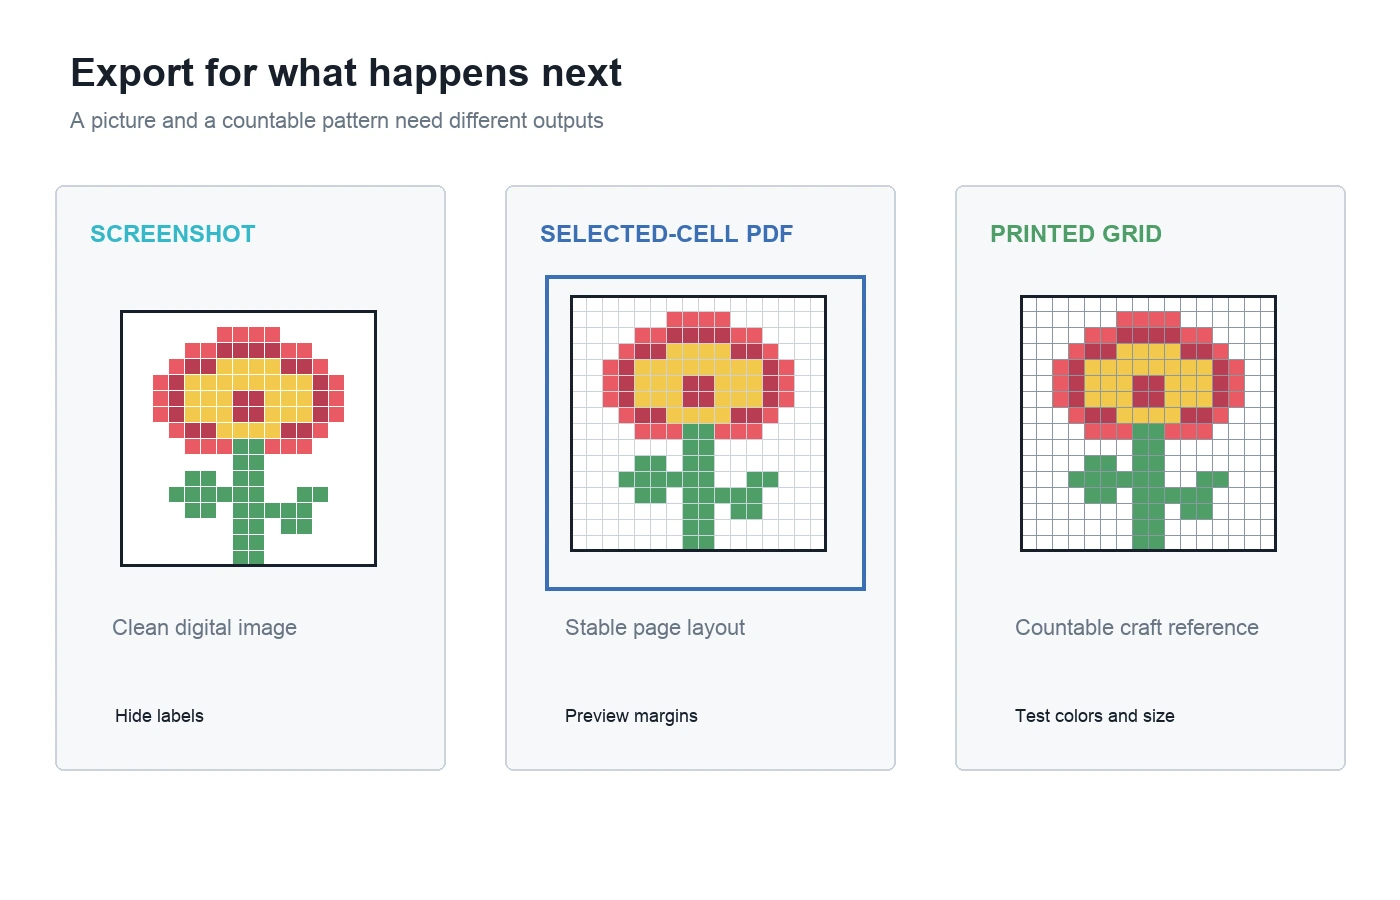
Screenshot for a quick digital image
Hide gridlines and worksheet labels, then capture only the art range. Do not enlarge the image with smoothing; nearest-neighbor scaling keeps edges crisp.
PDF for a stable printable grid
In Google Sheets, select the canvas, open File > Print, and choose Selected cells. Google's official printing guide covers margins, orientation, paper size, and page breaks.
In desktop Excel, define the print area and check Page Layout. Gridlines do not print by default, and fills can hide them. Microsoft's printing guide recommends explicit borders when every division must remain.
Print only after checking color and cell size
Print a small palette test when color matching matters. Confirm that cells remain countable and the artwork fits without nonuniform scaling.
Common spreadsheet pixel art mistakes
The cells are rectangular. Recheck row height and column width at normal zoom. In Excel Normal view, remember that the two settings use different units.
Merged cells break the picture. Unmerge the canvas and restore one cell per pixel.
The sheet becomes slow. Reduce the canvas, limit conditional formatting to the used range, and remove duplicate rules. Google also recommends cleaning unnecessary conditional-format rules in its Sheets performance guidance.
Gridlines disappear from colored cells. Apply borders when each filled cell must remain visibly separated, especially for printing.
The copied half is one cell off. Mark the center, compare equal-size ranges, and count width before adding details.
The export includes worksheet clutter. Select only the canvas, hide labels and guides that are not part of the output, and inspect the print preview.
A photo was pasted into the sheet and called pixel art. A photograph sitting over cells is still a photograph. Reduce it into deliberate color cells with an image-to-pixel-art workflow, then edit the grid.
Spreadsheet pixel art FAQ
Is Google Sheets or Excel better for pixel art?
Both work. Google Sheets is convenient for browser-based collaboration and pixel-based row or column resizing. Excel offers strong desktop print controls and templates. Choose the application your collaborators can open and the export workflow you need.
What grid size should a beginner use?
Start with 16 x 16. It is large enough for a recognizable simple object and small enough to finish manually. Move to 32 x 32 only when a specific detail cannot fit.
Should the final image include gridlines?
Keep lines when the output is a pattern someone must count. Hide them when the output is a clean digital picture. Borders are more reliable than worksheet gridlines when filled cells must print with visible divisions.
Can a spreadsheet convert a photo automatically?
Not in this manual workflow. Scripts and formulas can sample images, but they add a different technical task and still require palette and silhouette cleanup. Use a dedicated converter for the first draft.
Does this guide reveal answers hidden in a classroom pixel-art sheet?
No. It teaches how to create original spreadsheet art. It does not provide answer keys or methods for bypassing an assigned activity.
Good spreadsheet pixel art is controlled, countable, and easy to reuse. Build a square canvas, block the silhouette before details, choose a fill method that fits the project, copy repeated shapes with a center check, preserve a clean template, and export according to whether the next person needs an image or a working grid.