Bead Portraits: How to Turn a Photo Into Fuse-Bead Art
Learn the portrait-specific decisions that keep a face recognizable when a photo becomes a fuse-bead grid.
BeadsHub Studio
Author
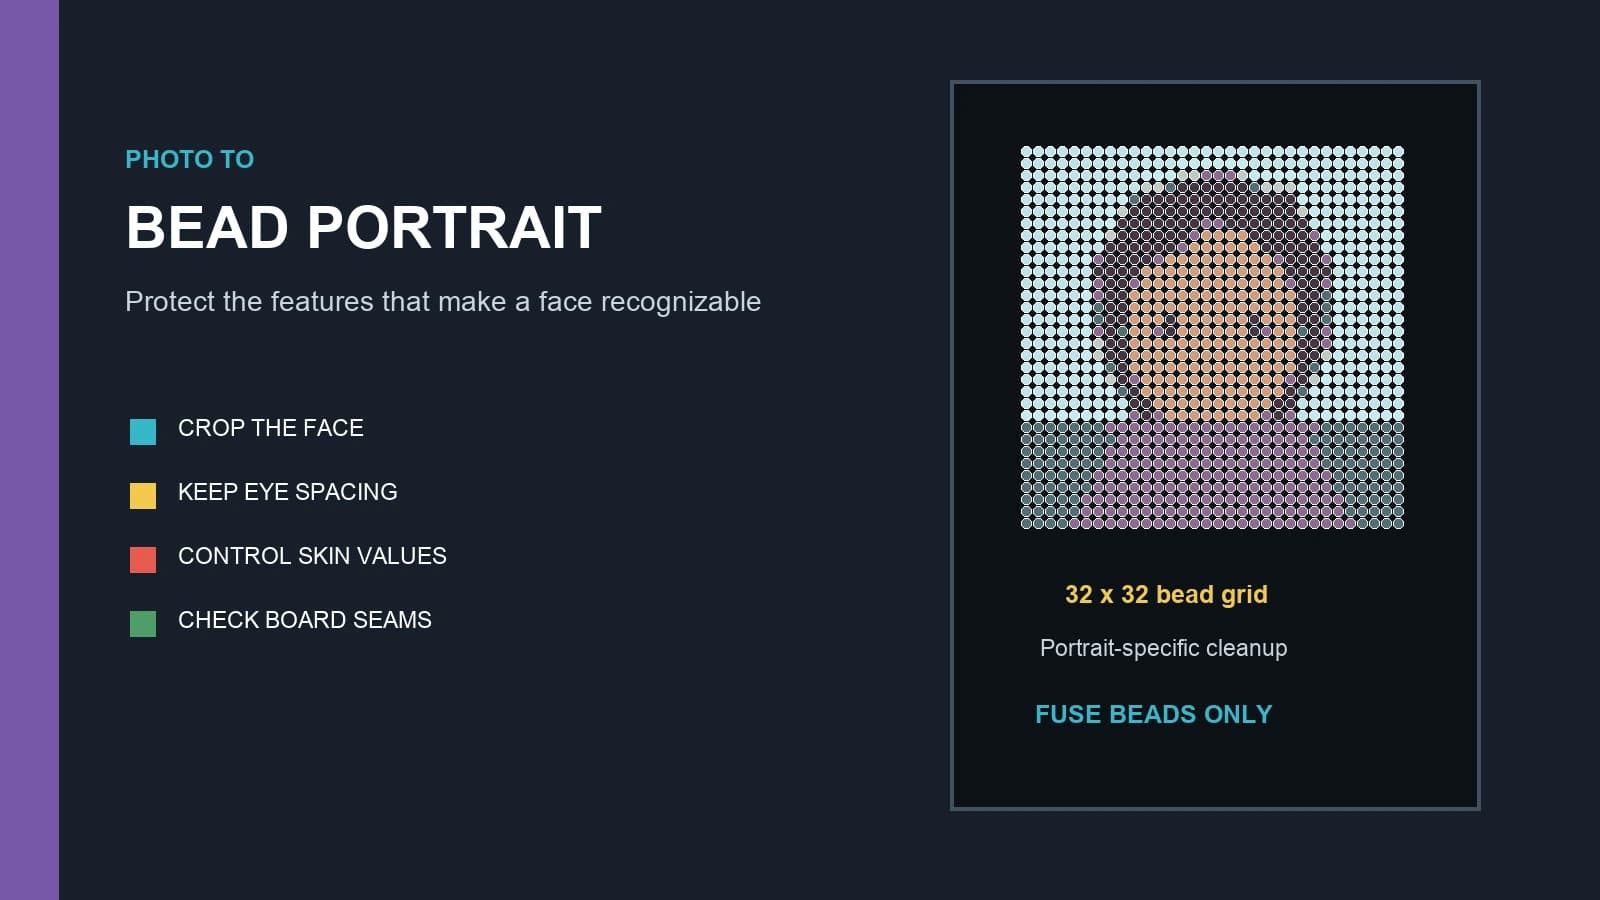
Recognizable bead portraits depend on a few small relationships: the distance between the eyes, the shape of the hairline, the light and shadow around the nose, and the edge of the jaw. When a photo is reduced to a fuse-bead grid, those features must survive before decorative detail is added.
This guide covers fuse beads on pegboards. It does not cover circular seed-bead medallions, loom work, bead embroidery, or automatic bead-placement machines because they require different structures.
The workflow is: choose a readable source, crop close, test resolution, build a controlled skin-value palette, clean isolated color noise, keep facial landmarks away from board seams, and fuse evenly. The result should be a pattern you can build, not merely a pixelated photo that looks convincing on screen.
What makes a bead portrait different?
General image conversion protects silhouettes and color regions. A portrait must also look like a particular person. A 16 x 16 grid may show a face without retaining enough eye spacing, hair shape, or shadow placement to identify the subject.
Portrait work therefore needs more resolution and manual editing than a simple icon. The best draft preserves identity with a palette and board size you can build.
Start from a reference grid, not a finished promise
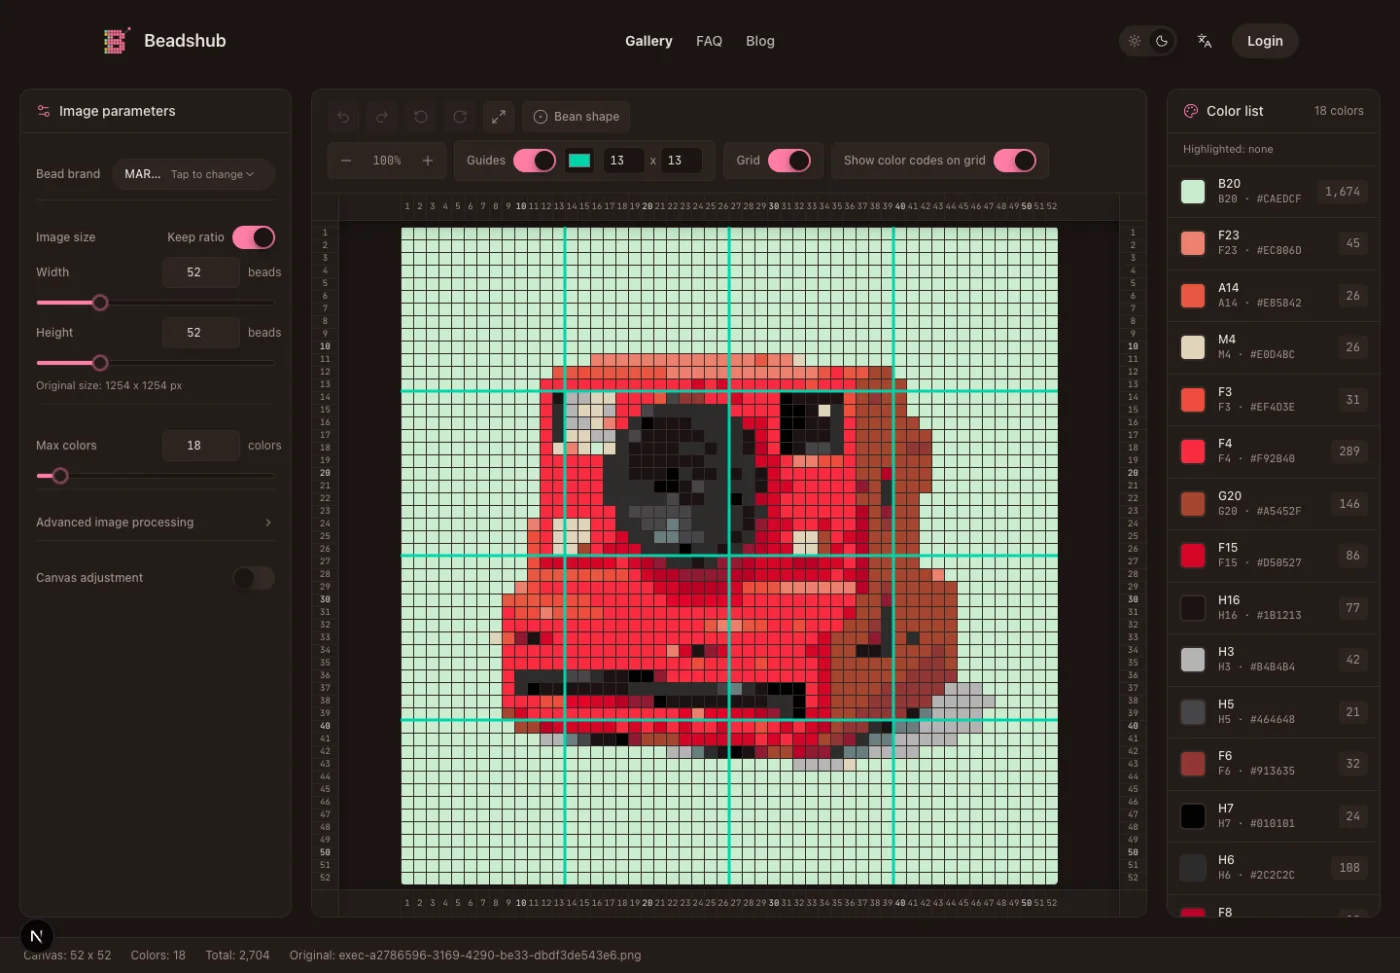
The BeadsHub pattern maker can convert an owned photo into a fuse-bead grid, limit colors, and provide bead counts. Treat that output as the beginning of portrait editing. Check every facial landmark and confirm palette colors against the beads you own before placing the pattern.
For general crop, sampling, and palette principles, read the image to pixel art guide. This article concentrates on the decisions unique to faces.
Choose a source photo the grid can read
Use one person, a front or gentle three-quarter view, even lighting, and background separation. A head-and-shoulders crop gives the face more cells than a full-body photo.
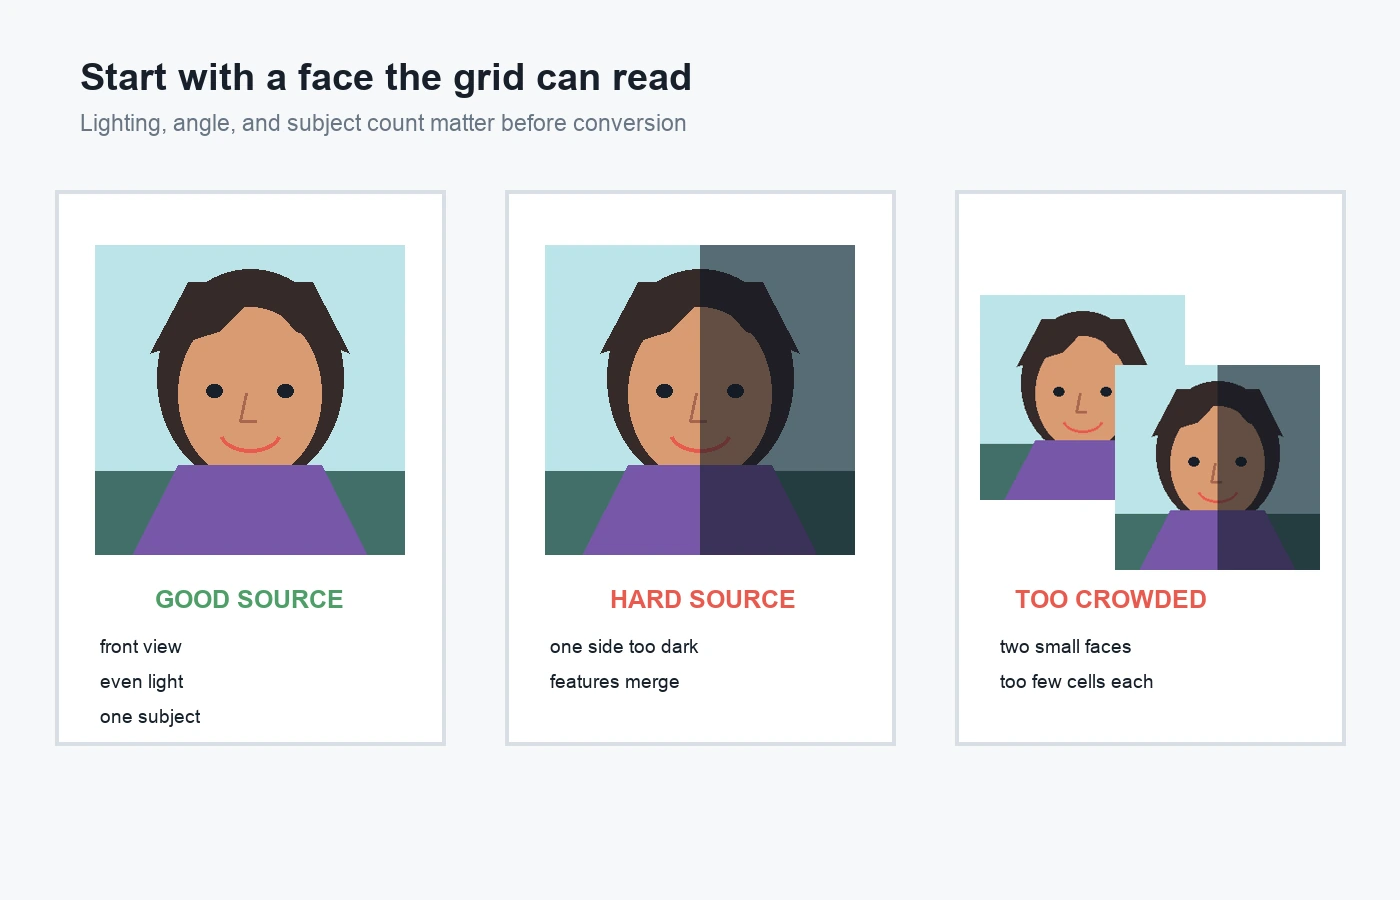
Prefer even light and visible features
Strong side light can merge one eye, cheek, and hair edge into a single dark area. Flat light can remove all facial form. Look for a photo with readable light, middle, and dark regions across both sides of the face.
Avoid beauty filters that erase the nose and cheek shadows. Those subtle value changes help a reduced face remain dimensional. You can simplify them later, but you cannot recover structure that the source already removed.
Crop out competing information
Background furniture, patterned clothing, jewelry, and other people consume cells and colors. Crop to the head, hair, neck, and enough shoulders to anchor the composition. Preserve the original aspect ratio unless stretching is intentional.
Use a photo you own or have permission to transform. A personal photograph does not automatically grant rights to logos or artwork visible inside it.
Choose resolution around facial landmarks
Test the same crop at several widths before committing materials. View every version at native size or from a distance, because zoom can make an unreadable face look more detailed than it is.
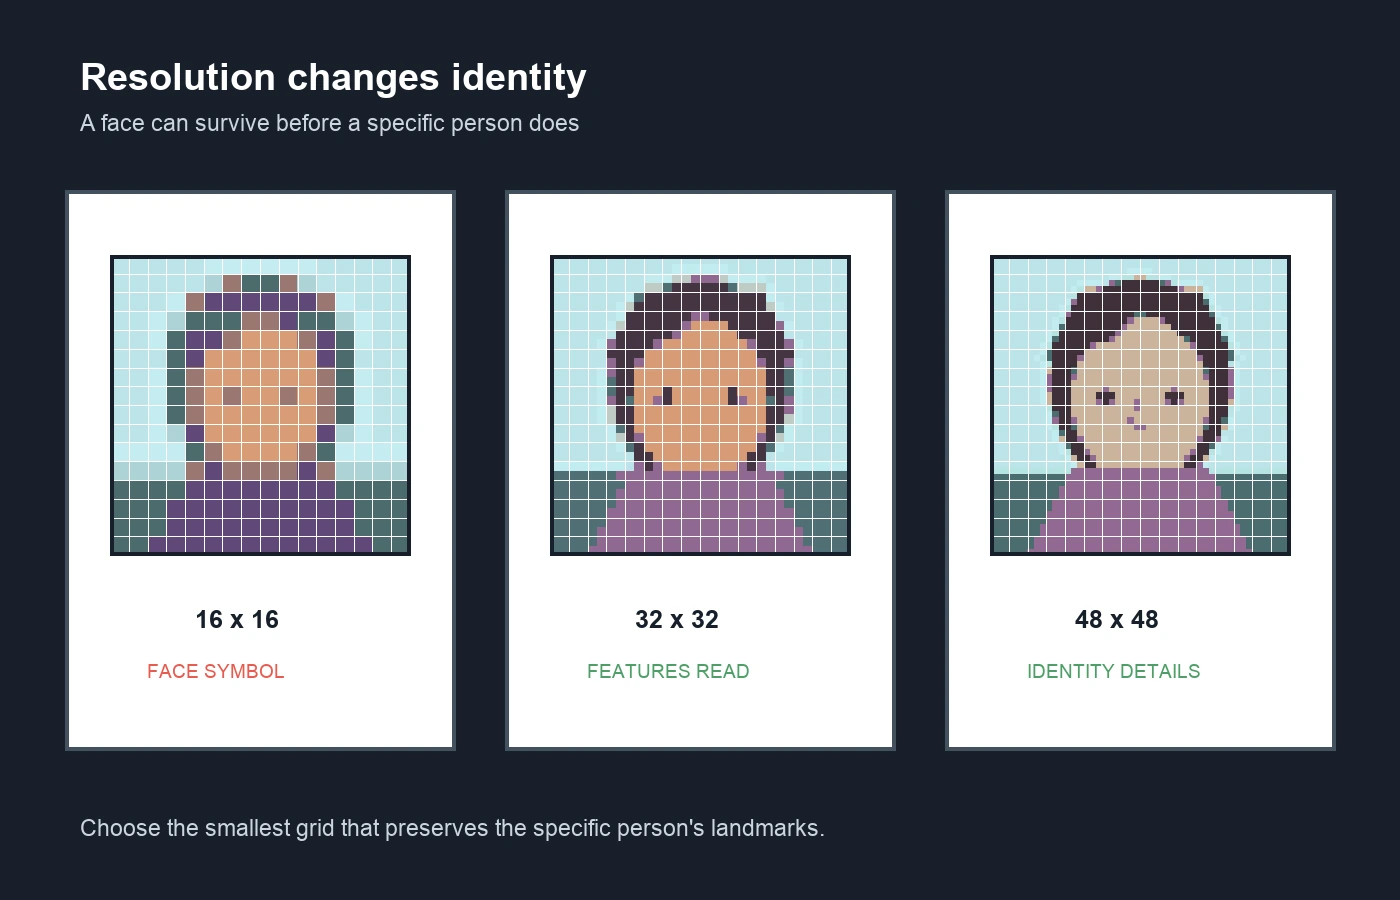
16 x 16: a face symbol
At 16 x 16, the image may retain hair, two eyes, a mouth, and clothing. It can communicate “person” or support a deliberately simple avatar, but small changes in eye position or jaw width have a large effect. Do not expect a subtle photographic likeness.
32 x 32: readable features
At 32 x 32, the eyes, brows, nose shadow, mouth, hairline, and face contour receive more independent positions. This is a useful test size for a compact portrait. Check whether the person is recognizable before adding extra shades.
48 x 48 and larger: identity details
Larger grids preserve glasses, curls, facial hair, highlights, and clothing boundaries but require more beads and often multiple boards. A 48 x 48 grid has 2,304 positions.
Mini vs. midi fuse beads
Mini beads pack more positions into a similar area; midi beads are easier to handle and suit larger wall pieces. Match the bead type, pegboard, tools, and fusing method. Perler's official Mini Beads project instructions use a dedicated square board and tweezers.
Build skin values, then remove confetti
A single face color creates a mask. Too many near-duplicate colors create noise. Begin with a compact ladder of dark shadow, shadow, midtone, light, and highlight, then reduce it if the physical palette cannot support clean steps.
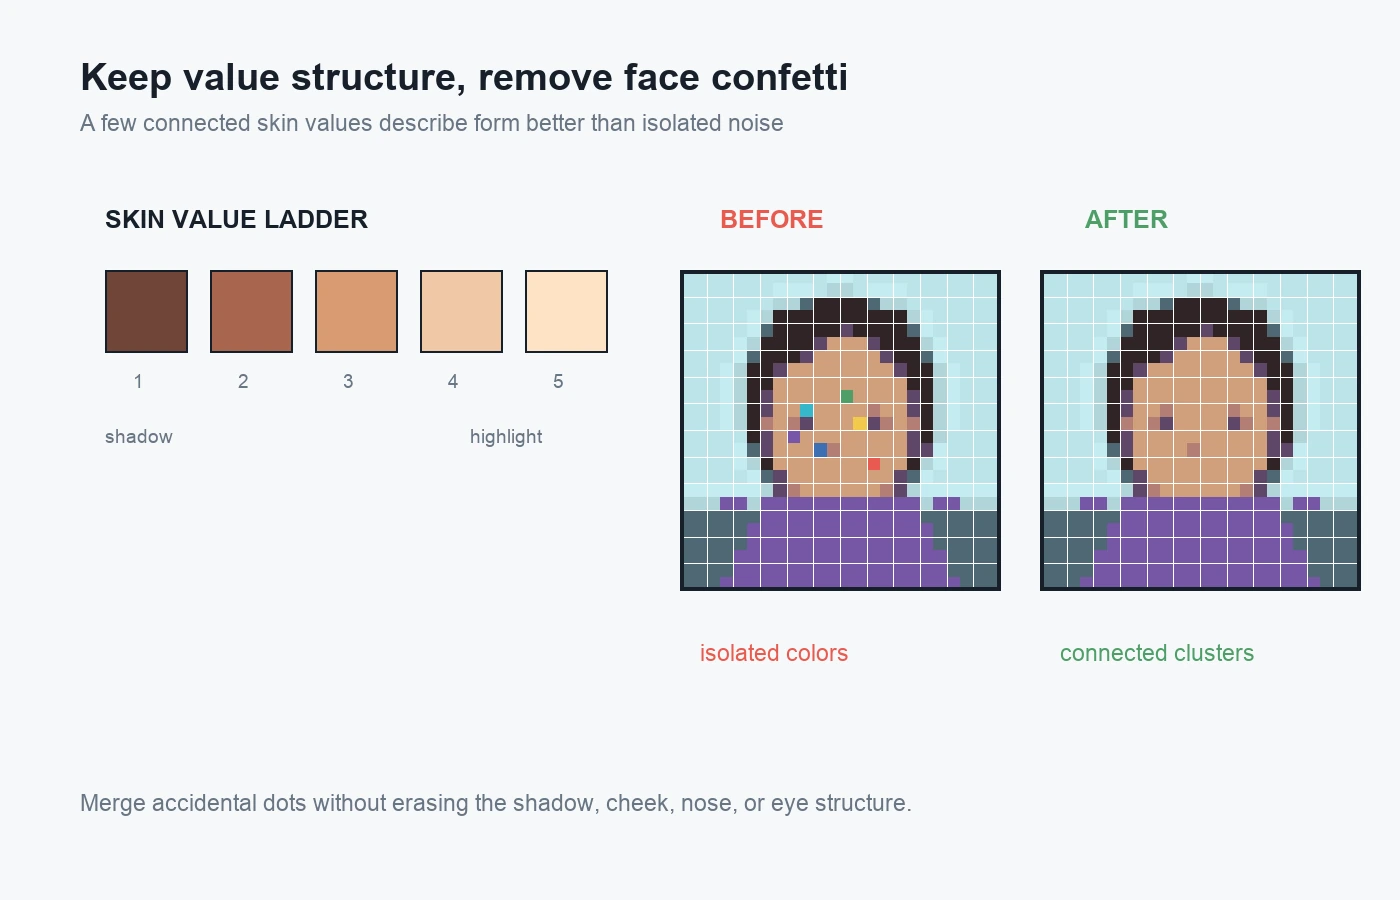
Use value before hue
Ask whether each color is lighter or darker than its neighbor before judging the exact hue. A warm midtone and cool shadow can work together when their values describe the face; two nearly equal values may merge even when their color names differ.
Keep the darkest value for pupils, deep hair, nostril or nose shadow, and the strongest outline breaks. Reserve the lightest value for a few highlights. Large uninterrupted midtone regions prevent the forehead and cheeks from becoming visual static.
Clean automatic face confetti
Photo conversion often creates isolated cyan, red, purple, or skin-tone cells in the cheeks and forehead. These spots may represent camera noise, compression, tiny reflections, or color matching errors rather than useful anatomy.
Replace accidental single cells with the surrounding face value. Keep small clusters that define an eye corner, nostril, lip edge, cheek turn, or hair transition. After each cleanup pass, zoom out and check whether the face became clearer without becoming flat.
Verify the physical palette
Screen color is approximate. Match every pattern entry to the actual fuse-bead brand and inventory you will use. If one shade is unavailable, merge it into the nearest useful value and review the whole face again. The Perler bead beginner guide explains bead sizes, boards, paper, and basic material choices without repeating them here.
Keep important features away from board seams
Large bead portraits often span several pegboards. Decide the board arrangement before final cleanup so a connection line does not cut through both eyes, the mouth, or another identity-carrying region.
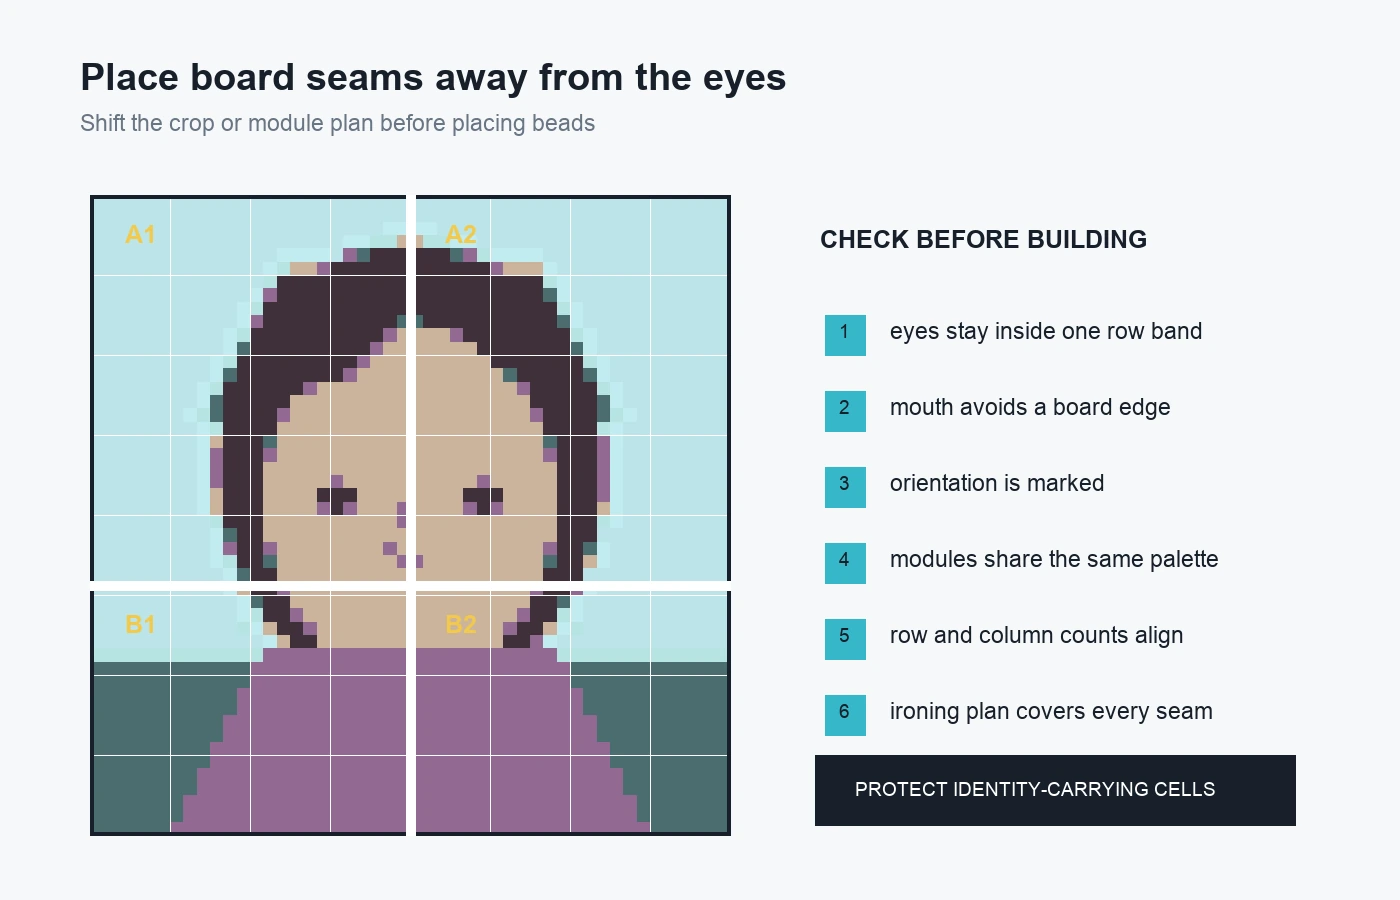
Shift the crop before shifting the face
If a seam crosses the eyes, move the image within the full canvas, add a small background border, or change the board arrangement. Do not distort facial proportions simply to avoid a join.
Label every module and mark the top edge. Use stronger count guides inside each board. Confirm that neighboring rows and columns align before placing hundreds of beads.
Build and check in sections
Place one board or countable region at a time. Compare eye position, hair outline, and jaw width after each section. A one-cell shift can propagate through later rows when counting starts from the last placed bead instead of a fixed edge.
The complete Perler pattern guide covers editing, color lists, pegboard fit, and printable references for the broader workflow.
Fuse a portrait without changing the expression
Uneven heat can widen one eye, close a thin highlight, bow the face, or distort a board boundary. Inspect all landmark cells before heat locks them in place.
Follow the manufacturer's method for your bead type. Perler's standard fusing instructions call for an adult to use a dry household iron on a heat-safe surface, cover the design with ironing paper, move the iron in a circular motion, and avoid pressing down. Lift the paper occasionally to inspect progress because colors can fuse at different rates.
For large work, decide whether to use the manufacturer's large-project or tape method before moving the design. Keep the iron level, work methodically across sections, and let the portrait cool flat. The detailed fuse-bead ironing guide explains heat tests, paper, flipping, cooling, and warp prevention.
Common bead portrait mistakes
The face looks generic. Increase the grid or protect more identity-carrying landmarks instead of adding random colors.
The face looks like a mask. Add connected shadow and highlight regions rather than one flat skin color.
The skin looks speckled. Remove isolated conversion colors while preserving clusters that describe anatomy.
The eyes feel wrong. Compare their spacing, height, and size with the source. Moving one cell can change the expression.
A seam cuts through the face. Shift the crop or board plan before building; do not stretch the portrait.
The pattern works on screen but not in materials. Replace unavailable colors and recalculate counts before sorting beads.
The finished face is warped. Use even heat, inspect frequently, and cool the project flat according to the bead manufacturer's instructions.
Bead portrait FAQ
What is the best size for a bead portrait?
There is no universal size. Use the smallest grid that preserves the subject's eye spacing, hairline, jaw, and important accessories. Test 32 x 32 first, then move to 48 x 48 or larger if the person is not recognizable.
How many skin colors should I use?
Start with three to five connected values from shadow to highlight. Use fewer when the design is small or the physical palette is limited. Add a color only when it clarifies form.
Are mini beads better for portraits?
Mini beads can provide more detail in a smaller finished area, but they require compatible boards, tools, and careful handling. Midi beads are practical for larger portraits and easier placement.
Can a photo converter finish the pattern automatically?
It can create a strong draft, but faces need manual checking. Repair eye spacing, mouth shape, hair edges, skin clusters, and board boundaries before treating the file as final.
Does this guide work for seed-bead medallions?
No. This guide is only for square-grid fuse-bead portraits. Circular medallions, loom work, and bead embroidery require different stitch paths, geometry, materials, and finishing.
Good bead portraits are designed around identity rather than raw photo detail. Start with a readable face, spend enough grid positions on its landmarks, organize skin colors into connected values, remove conversion noise, plan seams away from key features, and fuse evenly. Those decisions turn a generic face grid into a portrait that still resembles the person who inspired it.